This is my latest sequenced/book matched waterfall spalted birch dining table with through tenon aprons and bottom stretcher. Sequenced meaning the 2nd slice in the tree after the first. Book matched meaning opening up the slabs like a page in a book, rendering a nearly perfect mirror image to the other half. These slabs were then straight lined, but only enough in the center to still warrant some elegant epoxy work.
After joining the sequenced and bookmatched slabs, the week long journey of enormous bandsaw hand cut ties commenced. Each tie was cut specifically to it's new home in the slabs. No jig nor cnc was used in creating these ties. Each one although similar, is unique in its self. So is each subsequent mortise each tie belongs to.
Once the fifteen ties were inlayed, the form was built, the epoxy scheme was created, and then poured, and poured, and poured, and poured. Nearly 5 gallons of epoxy was used to fill the center live edge area of the two joined spalted birch slabs. I know what you're thinking. We didn't have a leak🤣.
During the 3 days of cure time for epoxy, aprons and the stretcher were harvested, milled, and dimensionalized from the two slabs off cuts. Such little waiste from both of these giant slabs! Tenons were cut into these three parts and mortises were cut through the waterfall legs by way of forstner bit, chisel/mallet, and flush trim bit. The bandsaw was used to create a kerf cut into each through tenon to prepare for the accenting wedge to draw these joints solidly, and tightly together for the test of time.
After dry fitting the waterfall legs to the top, mortises were cut into the 45 degree joints to accept the large floating tenons in both of these large joints. It took two complete dry fits with minor adjustments to ensure the final fit and glue up would be a completely excellent success! After the joy of witnessing what the final fit up had to offer, the table and it's integral parts were taken back apart like the pieces to a puzzle, and the long and daunting task of sanding and man glitter filled the shop air.
This leads us to our moment of truth. All hands on deck. Final glue up is upon us (the La Gra family.) We have but one chance to nail this after weeks of hard work. With Jesus music at level 8 of 10, babies strapped down and devices in their faces for distraction and entertainment, clamps positioned and prepared for ease and accessibility, floating tenons strategically placed, glue on hand with back up, and a quick prayer, we started speading that Titebond 3. No turning back.
The smoke settled with the final turn of the 16th parallel clamp it took to make the fit! Kim and I could now rest and free the bound and bored children from their wood dusted prison on the shop floor.
I apologize for the illustration of the glue up process. But if you know, you know. If you don't, come on over, let's glue up something big and expensive together. No don't. Lol. Kim will tell you, it's not a good idea.
A little (a lot) more sanding after clamp removal, a little admiring (a lot of admiring,) two coats of my favorite finish in the whole wide world, European two part hardening fancy fancy oil, and the table is complete. 158 man hours later.


Here we have a live edge slab that will be a dinning room table. It was brought to us completely ruffsawn. We prepped the live edge to perfectly bare wood, filled all checks and voids with black dyed epoxy, mortised in 27 maple bowties, and finished off with 8 pours of epoxy.


Every serious woodworker knows they need a big clean work space to create all their designs. This piece is what we use for our work bench. We built the base from plywood and added a nice butcher block top to go with it. Finishing off the design to keep its durability we added 5 coats of epoxy.
The long run of the butcher block counter below the work bench is where the table saw sits. It’s the perfect length for cutting long boards of all sizes.


This customer had a tile island that she wanted transformed into something beautiful. We pulled up the existing countertop and replaced it with a custom Sapele butcher block that we built.


These butcher block countertops really set off this space in the pantry. Following along into the living room area they wanted to go with a butcher block hearth and matching floating shelves.


This customer asked for a custom Black Walnut Island piece. With our shaper origin we were able to cut out this image and inlay it into the wood.


Justin built this job site table for himself. It comes in handy with the rollers attached and the storage in the drawers to place the tools he needs for each task around site.


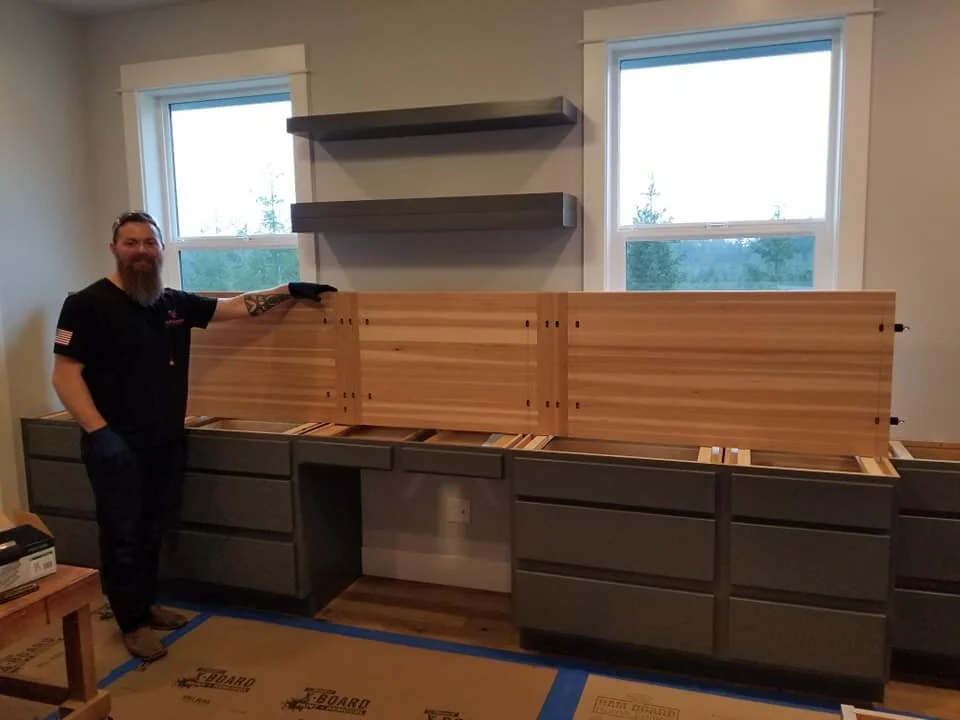
This butcher block counter top space was designed for a lady in her art room. She wanted something that was elegant to match her new cabinets. The joinery process used on these were made possible by Festool Domino Joiner. The Domino is stronger and more versatile than biscuits or dowels. It also makes it possible to take the butcher block pieces apart and add to them down the road if you’re looking to expand later.


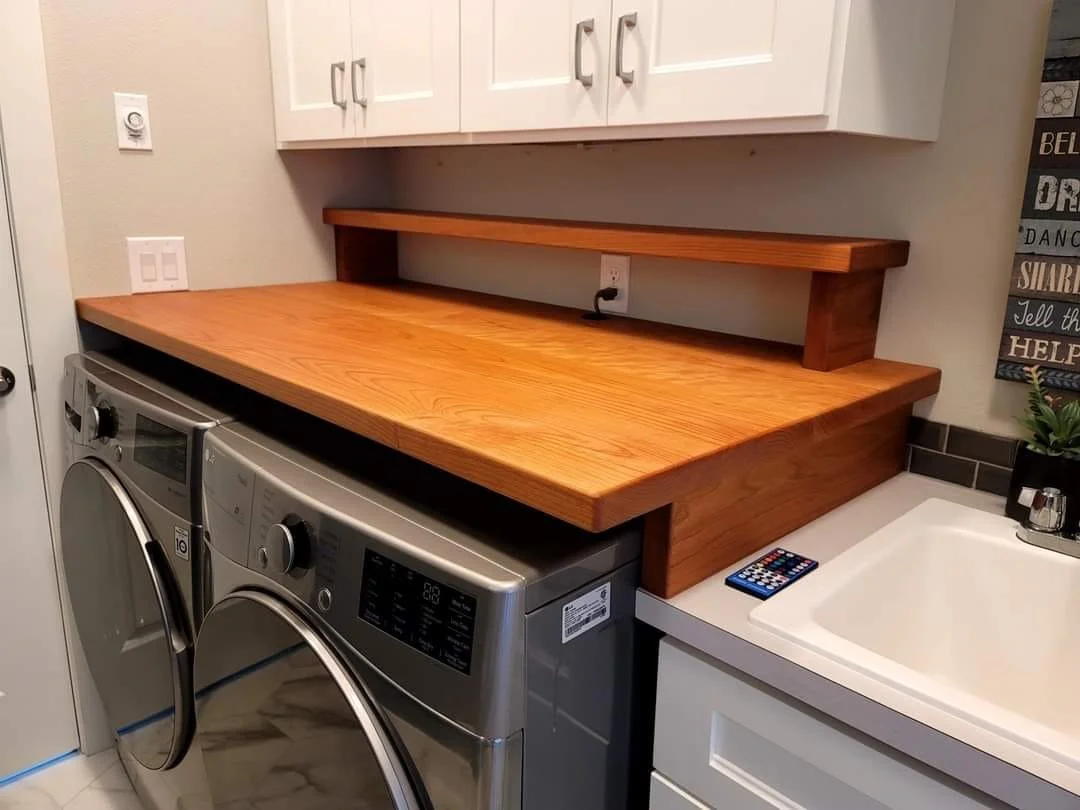
This customer wanted to go with a Black Walnut butcher block counter. It was so appealing that he added in butcher block shelves to match in his laundry room.


This customer wanted an elegant workspace that also matched the space that she was in. This custom made maple floating desk matches the barn doors that we made for the same area.